

We’ve had some beautiful weather — just perfect to work on the climbing roses and I have several! If you are interested, here they are….
- Peggy Martin (3)
- New Dawn (3)
- Jasmina
- Francis E. Lester (more rambler than climber)
- Ghislaine de Feligonde
- Bathsheba
- The Generous Gardener (2)
- Veilchenblau
- Papi Delbard
- Honeymoon Arborose
- Lady Ashe
Mercy, I sort of forgot I had so many until I wrote the list! I told Mr. G this week I really do not need any more climbers. 🙄 I hope he forgets I said that.
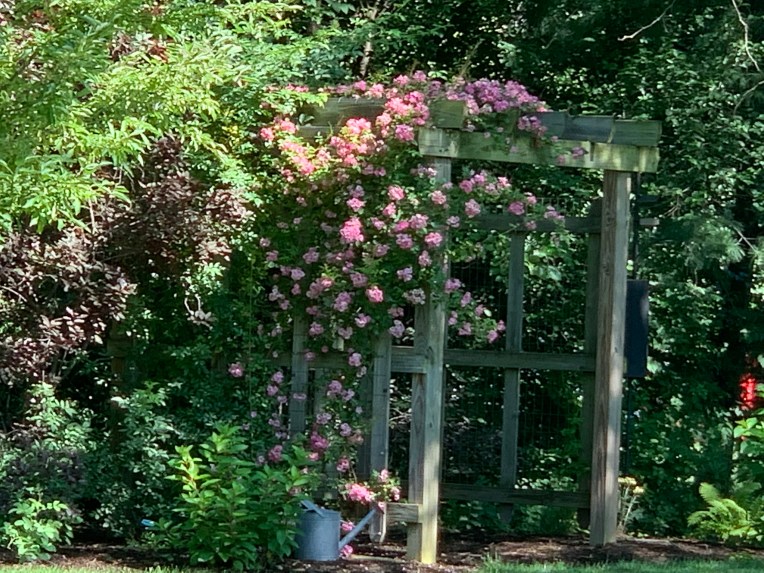
I love them! Nothing adds charm and beauty to a cottage garden like climbing roses (or clematis for that matter but that’s a story for another day).
DO CLIMBING ROSES REALLY CLIMB?
So, do climbing roses actually climb? NO, they send out long arching canes that we shape and secure.
In the last few weeks, my climbers have been sending long, long canes. Some are 10’ – 15’.

So, I am doing “ladder time.” Even though I am not the most comfortable on a ladder and even though I do get the occasional prick. (Ever tried to tie up New Dawn??? OUCH.) .. I consider it a wonderful job. While up there I am looking over the garden – making plans as I gaze. And while I am shaping up the climbers, I almost get giddy as I visualize how gorgeous they will be in the spring as a result of my love touch.
MOST COMMON QUESTION ON CLIMBING ROSES
A question I hear often is “why do my climbing roses only bloom on the tips?” The answer to that question is they bloom on laterals. So to produce more lateral canes, you need to secure the long main canes horizontally – this forces lateral growth all down the cane and those laterals will bear flowers. Note: Work with your canes to gently shape – not a harsh angle that might damage the cane. Ask me how I know this…. Yes, experience. 🤦♀️

Another common question is what do I use to tie my roses.
As you can imagine through the years I have used just about everything — including pantyhose – and they work. #truth However, my tie of choice is the green stretchy tape. Check it out on Amazon here.
PRUNING CLIMBING ROSES
My rule of thumb is don’t do an overall prune of climbers — especially for the first three years while they are getting established. Pruning climbing roses is very different from pruning shrub roses or hybrid teas. Your task from the start and ongoing will be to trim out dead, diseased, or any cane that does not contribute to the overall health and beauty of the rose. As you watch your climbing rose grow you will begin to see what I mean. #trustme
ROSE TERROR 😱
Just in time for Halloween, I have a scary video for you to watch. Be sure you watch all the way to the end! In this video, Ben Hanna, owner of Heirloom Roses, is pruning his very established climbing roses. Even I panic when I watch this video. In 15 minutes he will terrorize and teach you!
REMEMBER, STAY UNTIL THE END and see the rewards!
Another pruning video that is very helpful and not quite so scary is this video by Paul Zimmerman. Paul will entertain you and educate you on the many facets of training roses!
Favorite line from this video… “sometimes you have to be cruel to be kind to the rose.” #truth
As with all plant care, visit your plants regularly and they will help guide you to what they need.
BLOOM THYME
We started the week with one night dipping down to 32 and some of the roses didn’t like it. Some of them didn’t mind at all.


If you are like me and your garden season is ending, start following Michele Endersby on Facebook or Instagram. Her season is just getting started. Her artist’s eye and love of roses might just get us through the winter.
FALL TREAT
One of our family’s favorite fall treats is CARAMEL DIP for apples. (You can dip anything you want but yummy fall apples are ooh la la!)
I have been making this simple recipe for more than 30 years. I first put it on my blog in 2012 and it continues to be one of the most downloaded pages. If you want to see the original post, read on here.
RECIPE
1 Package of Kraft Caramels Note: I buy Kraft Caramels in 11oz packages (40 caramels)
1 Stick of Butter
1 Can of Sweetened Condensed Milk
That’s it! Stir over low heat until everything is melted and blended. This takes about 20 minutes.
Do stir constantly … this mixture BURNS VERY EASILY!!
I love packaging the dip in little jelly jars … 15 – 30 seconds in the microwave and it is perfect. If they last long enough, store in the refrigerator!


What are your favorite fall treats?
NEXT TIME
Next time we might have to talk about bulbs. Little boxes keep being delivered. Kinda like Christmas!